Textural Maps
Project Summary
This will be a short description of how to make and organize large-scale architectural textural maps for the blind.
Project Details
The entire project begins with uploading a floor plan as a canvas. (insert > canvas > upload file)
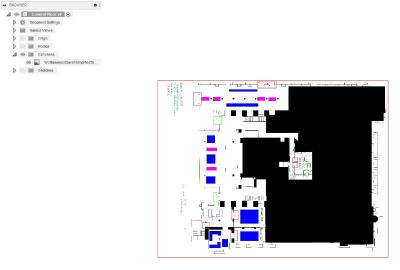
A picture of the canvas.
After uploading the floor plan, the walls need to be traced with lines. Once the walls are completed, the designated areas need to be traced as well. All of these surfaces will be extruded to a lower height than the walls. The upper faces of all of the areas that are desired to be one texture should all be at the same height. The faces of a single texture are selected and then a sketch is initiated. By as series of rectangular patterns and copy and paste, the patterns can be applied to the surfaces and extruded. Proper labeling should be observed when making pattern sketches in order to reduce confusion later.

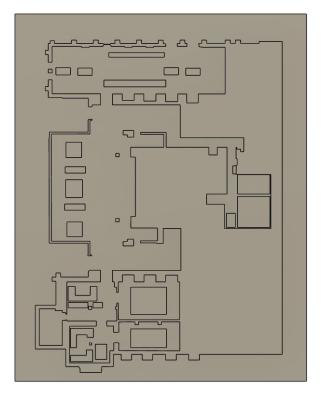
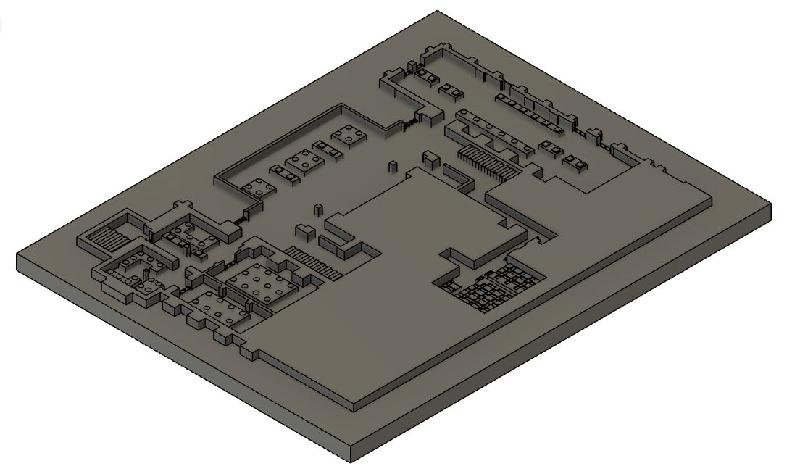
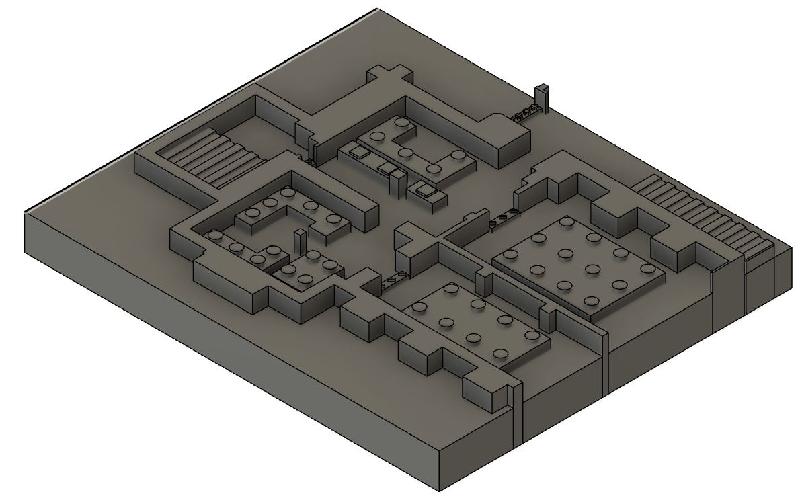
The three above pictures, from left to right, show the walls, the walls + base + features, and the walls + base + features + textures and their proper labeling respectively.
After the feat of texture design is accomplished, the CAM processing should come much more easily and be much more exciting. Navigate to the "Manufacture" tab for the next steps. The setup is a bit tricky at times, just keep at it!. To ensure a proper setup the box-point should be in the lower left hand corner (when viewed from the top) with the positive x- and y-axes pointing into the workpiece. The stock thickness should be set to the thickness of your workpiece NOT your design.
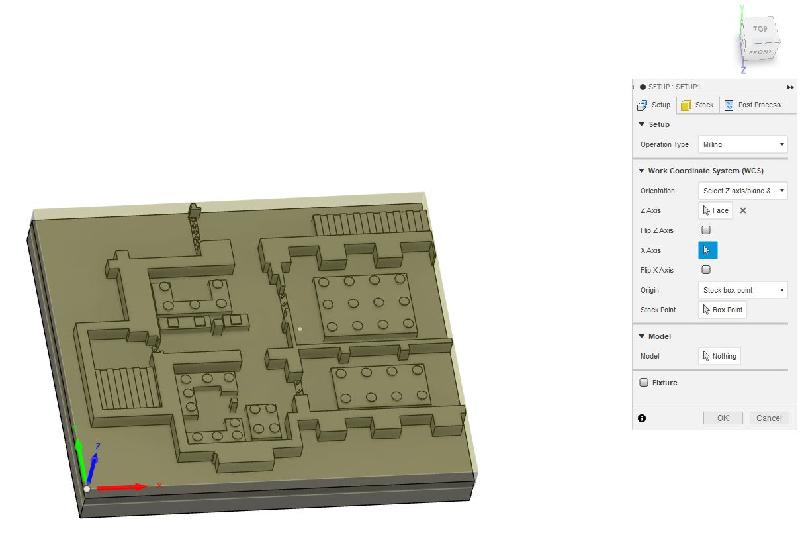
A picture of the setup.
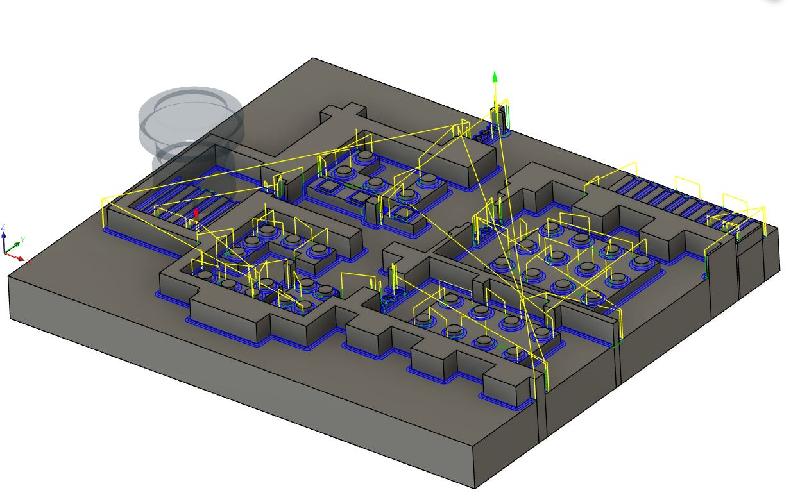
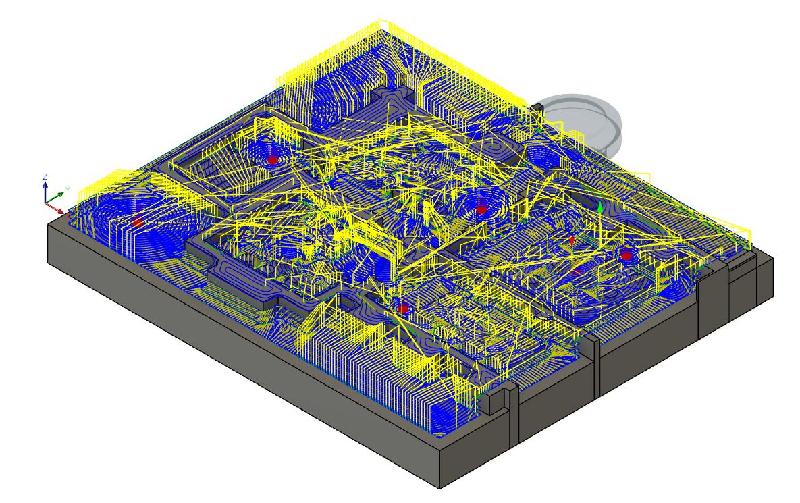
Once the setup is properly set up, perform a 3D milling process called adaptive clearing (3D milling > adaptive clearing). Enter in the tool dimensions that you want to use. Make sure to set the maximum roughing step down in the passes tab of the adaptive clearing to something reasonable for your bit and material. The most advanced part of the CAM process are the proper feeds, speeds, and depths of your passes. These values are highly bit dependent, material dependent, and inter-dependent. Deep passes need to be run really slow to avoid breaking the bit making them less preferable for melty materials. Shallow passes may work only the tip of the bit and may take longer to mill but can generally be run faster and are safer. Observe proper feeds and speeds for your particular situation (look at online handbooks). Typical depth is 1/2 of bit cutting diameter.
After the adaptive, a pencil mill is normally run to further define features and textures with a smaller bit but this step is optional depending on map scale.
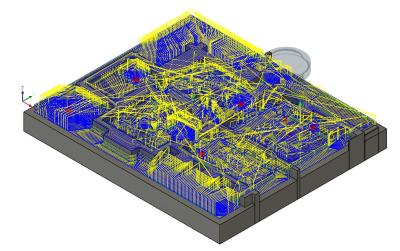
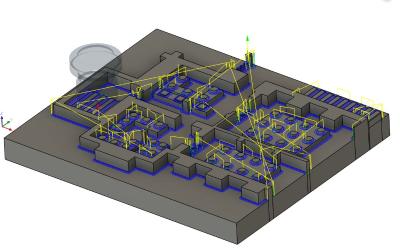
From right to left, the adaptive and pencil mills generated by the computer.
The last step is exporting to the ShopBot. This can be done in the post-process selection menu by selecting ShopBot/.sbp type configuration. (actions > post process > change config (drop-down menu left of open config)). In the bottom left hand corner change the units to inches because the ShopBot only deals in inches.